Carney All Seasons Blog: Archive for October, 2010

Halloween Treat – $100 Off a New Sump Pump With Battery Backup

Thursday, October 28th, 2010

What’s scarier than a cold and stormy Halloween night?

A cold and stormy Halloween night when the power cuts out and the water starts to rise in your basement!

Fortunately, we’ve got just the right solution – at a real treat of a price.

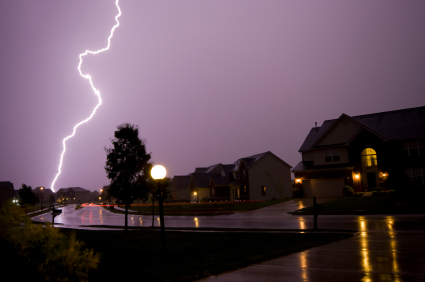
A storm passing through a neighborhood

A sump pump keeps your basement dry when a storm comes through your neighborhood!

If your basement regularly gets damp or flooded, eventually it’s going to start looking and smelling like one of those musty old basements in a cheap horror movie. Sump pumps are a great way to protect your home and maximize its usable area.

A battery backup system makes sure that your sump pump works when you need it most – during and after major storms. Battery backup doesn’t add much to the cost of a sump pump – and the peace of mind it gives you is priceless!

Get $100 off a new sump pump with battery backup!

P.S. Happy Halloween, everyone. Have fun and stay safe!

Continue Reading

It’s Easy to Prevent Burst Pipes This Winter

Wednesday, October 20th, 2010

Burst pipes are expensive, destructive, and…preventable.

Most people know that they need to winterize the plumbing in a camp or vacation home to keep it from freezing over the winter and bursting the pipes. But you also need to winterize the plumbing in your primary residence, even if you’re going to stay there all winter.
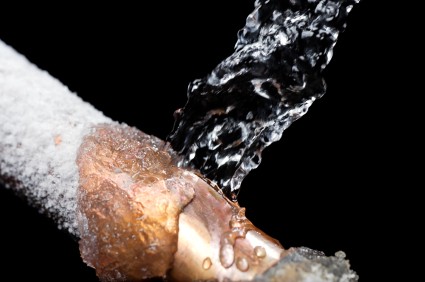
A burst pipe - what you want to avoid this winter

Burst pipes - easier to avoid than you think!

This is really one of those situations where an ounce of prevention is worth a pound of cure – and the prevention is easy.

The right pro-active maintenance will keep your home’s pipes warm and cozy all winter, so that you and your possessions stay comfortable and DRY!

Here’s how you do it:

1. Insulate exposed pipes

Check to see if you have exposed piping in un-insulated spaces such as a crawlspace, attic, outside walls, etc.

If you have exposed piping, you should insulate the pipes. The materials are inexpensive and the task doesn’t require a high level of DIY skill. However, it does require patience and care to ensure that pipes are completely covered.

There are a number of different options for insulating pipes. You can wrap regular fiberglass attic insulation around pipes, but an easier alternative is the foam or fiberglass tubing (also called “tubular sleeve insulation”) that is made specifically for pipes. You should look for insulation with an R-4 rating (most standard 5/8 foam tubes have this rating).

Whatever insulation you use, make sure you begin by removing any dirt or grease from the pipes with a rag and mild cleanser. Allow the pipes to dry thoroughly before wrapping them with insulation. Make sure you cover the pipe completely, taking extra care at corners wherever two sleeves or pieces of insulation meet. Wrap these areas with duct tape to seal them completely.

(Always use duct tape to secure the insulation to your pipes. Other forms of tape, like masking or electrical, will stretch or break over time. You’ll lose the integrity of your seal, and eventually you’ll have to tape the pipes all over again.)

If you have pipes that have frozen in past winters, or pipes in spaces that will fall below zero, you may wish to consider using heating tape. It is a plastic strip with heating elements embedded in it that can be wrapped around pipes and plugged in. Heating tape is easy to install and can be purchased in most hardware stores. While it is effective, it can be expensive to operate and so should only be used when regular insulation is not enough.

Note: When you’re looking for exposed pipes to insulate, focus on pipes where the water comes in, not pipes where the water drains. Drain pipes – except for the traps beneath sinks, tubs, and showers – generally do not hold enough water to cause damage if frozen.

2. Caulk outside pipes

Caulk around pipes where they enter your house from the outside. There are lots of different types of caulk, so check with your plumber or local hardware store to find out which type will be best for your home.

3. Shut off and drain exterior faucets (or insulate them)

First, go down to your basement and locate the shut-off valve for each exterior faucet. Turn the valve so that the water supply is shut off. Then, go outside and turn the faucet on, so that any remaining water drains out of the faucet. (You can leave the faucet in the on position all winter.)

Not all faucets have a separate shut-off valve in the basement. Check with your plumber if you’re unsure.

If you can’t shut off and drain your exterior faucets, you should insulate them. The easiest, most attractive, and most effective way to insulate them is with molded foam insulating covers. These are available at most hardware stores.

And…don’t forget to drain your hoses and bring them inside for the winter! You should also drain and shut down your sprinkler system (follow the manufacturer’s instructions).

Continue Reading

Easy Do’s and Don’ts for Winterizing Your Heating and Cooling System

Wednesday, October 13th, 2010

Like it or not, winter’s coming! And we guarantee you’ll enjoy winter a whole lot more (or at least hate it a whole lot less) if your heating system is working optimally.

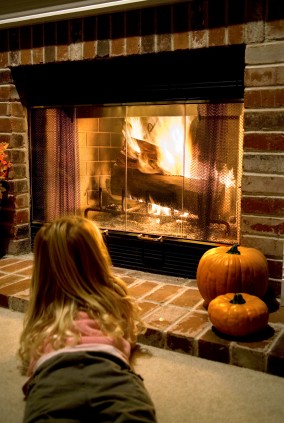
Getting your heating system ready for winter will make the winter cozy and fun!

Getting your heating system ready for winter will make the winter cozy and fun!

Furnace maintenance is actually very easy – much easier than dealing with a major repair. These simple “to-dos” take about half an hour to complete, and are well worth your time. You’ll save money, avoid annoying and expensive breakdowns, and help keep your family safe and comfortable all winter long.

And, our list of “don’ts” will help you avoid mistakes that can cause equipment breakdowns and endanger your loved ones.

(As a bonus, these do’s and don’ts will help your air conditioning system survive the winter in great shape so that it’s ready to go when summer returns!)

  • DO…Call for your annual service ASAP, if you haven’t yet.
  • DO…Remove flammable items that may have been stored next to the furnace over the summer (weed whackers, lawn movers, gas cans, etc).
  • DO…Change/clean your air filter regularly, especially during heavy use seasons (winter and summer). You should replace disposable fiberglass filters, and wash electrostatic or electronic filters, at least every three months, and more often if they look dirty. A dirty filter will slow down air flow and make the system work harder to keep you warm or cool (a waste of energy). A clean filter will keep dirt and dust out of your system, increasing its longevity and reducing the need for expensive repairs.
  • DO…Check your thermostat programming to make sure it reflects your family’s current schedule. This will help you reduce energy costs.
  • DO…Check your chimney to make sure there are no cracks or loose bricks.
  • DO…Remove window AC units, and cover outside AC units to minimize damage from winter weather and debris (you can buy a cover at your local hardware store).
  • DO…Install a carbon monoxide detector next to your sleeping area.
  • DON’T…Try to service your heating system on your own. Leave it to qualified professionals!
  • DON’T…Wait for the first cold night to turn on your furnace for the first time. Test your heater for a few minutes while it’s still warm out (like in early September), to make sure that it’s working well on the first cold day. Also, if it’s warm, you can comfortably open the windows to disperse that “first time” smell.
  • DON’T…Try to turn on the heat while the thermostat is still set in AC mode. Just setting the dial above room temperature won’t activate the heat if the system is still in AC mode.
  • DON’T…Cover outside AC units with plastic. Plastic traps moisture and can lead to rust and deterioration. Instead, use a cover specifically designed for outdoor AC units.
  • DON’T…Assume that because you have a carbon monoxide detector, you don’t need to schedule a furnace inspection. A carbon monoxide detector should be a second line of defense, not a substitute for annual service.
  • DON’T…turn off the heat when it’s cold out, even if you are leaving your house for several days. Set the thermostat to at least 55 degrees so that your house stays warm enough to keep your pipes from freezing.

Continue Reading

Why You Should Get a Fall Tune-Up
…Even If You’d Rather Not Think About It

Friday, October 8th, 2010
A Carney furnace tune-up will give you peace of mind!

A Carney furnace tune-up will give you peace of mind!

Let’s be honest here. Unless you’re an HVAC contractor, you’re probably not particularly interested in your heating system. And that may lead you to skimp on routine maintenance.

But…if you really want to think about your heating system as little as possible, then routine maintenance is exactly what you need.


Limited time offer: Gas Furnace or Heat Pump Tune-Up – only $99!!


According to a study conducted by the Louisiana Cooperative Extension Service, 9 out of 10 HVAC system failures are caused by dirt and dust. That means that if you hire a professional to clean and service your furnace, and you change your furnace’s air filter once a month, you are 90% less likely to have a breakdown this year!

This, of course, is terrific news for your budget. Not only will you save by minimizing the possibility of a major repair, you’ll also increase your heater’s efficiency, which means lower energy bills this winter.

And that means more money for that new car, the kids’ college tuition, or (just maybe) your dream vacation.

But even better than that, routine maintenance leads to peace of mind. You’ll have less hassle, less worry, and a lot more time relaxing cozily in your house, doing whatever you want to do, while your heater minds its own business in your basement.

So, now that you’re persuaded…what routine maintenance do you need?

You should get an annual tune-up/inspection every year. A good furnace tune-up will include:

  • Checking the thermostat to ensure that the settings are comfortable and energy-efficient
  • Checking all electrical connections, motors, and controls
  • Testing the pilot light and the ignition
  • Lubricating the blower bearings and blower motor as recommended by the manufacturer
  • Cleaning dust from the blower compartment
  • Inspecting gas or oil connections, gas pressure, and burner combustion
  • Inspecting the heat exchanger to make sure it’s not leaking carbon monoxide
  • Checking the pilot light if the furnace has one
  • Testing air flow
  • Checking vents, drafts, and flues
  • Checking for gas leaks
  • Checking the safety components, such as limit controls and pilot safety; and
  • Inspecting the condensate drain (if the system includes central air)

Then, there are a few simple things you should do yourself.

  • Make sure nothing flammable has been stored next to the furnace over the summer (weed whackers, lawn movers, gas cans, etc).
  • Give the outside of your furnace a good dusting (also, dust the areas near it).
  • Test your heater for a few minutes while it’s still warm out (like in early September), to make sure that it’s working well on the first cold day. Also, you can comfortably open the windows to disperse that unpleasant “first time” smell.
  • Make sure that your thermostat is set in the heating mode when heating season starts. Just setting the dial above room temperature won’t activate the heat if the system is still in AC mode.
  • Change/clean your air filter regularly, especially during heavy use seasons (winter and summer). You should replace disposable fiberglass filters, and wash electrostatic or electronic filters, at least every three months, and more often if they look dirty. A dirty filter will slow down air flow and make the system work harder to keep you warm or cool (a waste of energy). A clean filter will keep dirt and dust out of your system, increasing its longevity and reducing the need for expensive repairs.
  • Install a carbon monoxide (CO) detector near your bedroom, and test it monthly. (Tip: do this whenever you change your air filter. And replace the batteries each year when you test your heater.) Please note that a CO detector should be a second line of defense, not a substitute for an annual furnace inspection.

Everything on the list above should take you about half an hour a year, in total. That’s a pretty minimal amount of time in exchange for months and months of worry-free operation!

PS. Everyone is suddenly interested in their heating system if it’s the first cold night and their furnace doesn’t work. This is not the time to schedule a tune-up. Do it now and beat the rush!

Call Carney at 215-346-7160 or contact us online to schedule an appointment.

Continue Reading